‘Proper’ coffee machines are becoming popular in many households as, with the rise of coffee shop franchises like Starbucks and Costa Coffee, consumers increasingly want to replicate that ‘freshly pulled’ taste in their homes rather then settle for filter or instant alternatives.
Well, you can not only replicate that taste, by applying some simple rules you can better it every time.
Unfortunately for most consumers, there is initially more than meets the eye to preparing a truly great cup of coffee from an espresso machine. It takes some practice and experimentation to get it right. Here’s my guide….
Fourth Estate Coffee's Guide To Making An Ideal Espresso and Cappuccino
The Machine
Ok, firstly, there is a minimum equipment requirement to do this properly. You don’t need to spend a fortune (I haven’t!) but you do need to spend a bit. Here’s what I think you need to do the job properly. This list is based on what I own and have gradually acquired to come up with a functional coffee bar in my kitchen.

Read More: Best Espresso Machine
What machine to buy?
Machines that look the part go from only 20 pounds or so in the US – they will not do!! General rule, avoid anything made by a company who usually produces cheap toasters, and everything with ‘dual function’ (i.e. Drip coffee and espresso coffee).
The minimum you need is a machine powered by a pump delivering at least 9 bar of pressure. Most really cheap machines rely on pressure generated by steam as a result of water boiling, avoid these.
Your machine will also have either a boiler or a ‘thermoblock‘. A boiler is just that, whereas a thermoblock is a heating element that water is passed through on it’s way to the pump. Boiler machines are usually more expensive, higher maintenance and take longer to heat up, but come from the high end and are ‘better’ through the virtue of quality and sharing heritage with professional machines. Thermoblock machines are cheaper, low maintenance but work just fine. That said, it a thermoblock machine breaks you can probably bin it, a boiler machine is the kind of thing that you can take apart and fix.
I currently use a Cafe Barista Espresso Maker and Breville BES870XL for my job, it did the job well.
Here’s a minimum spec to look for
- Pump driven, 9 bar pressure
- Boiler or Thermoblock water heater
- Two sizes of coffee hopper (single and double shot)
Here’s what you don’t need
- Combined with a filter machine
- An automatic cappuccino attachment
- Fancy looks
- A ‘pod’ system – not for proper espresso, no, no, no.
Do you get it yet? All you need is a decent hopper, water at the right temperature and the right pressure. No gadgets or gizmos.
The Coffee Grinder
Do you NEED a grinder?.. I used to say No, that quality pre-ground coffee will result in really good coffee, but as I drank more and learned more I changed my mind. Yes, I think that if you’re going to do this properly you need to grind your own beans for decent coffee pre-grinding spells death to the taste of coffee. That said, I will still cover pre-ground coffee further down as not everyone wants to rush out and buy a burr grinder.

A quick lesson – Roasted coffee contains a lot of CO2, when freshly roasted it contains huge volumes of it and needs to be rested for a few days before it is drunk. The flavour of coffee comes from the oils and lipids within the beans and these are not water soluble – they need the CO2 in the beans to carry them into the cup. When you grind coffee the massive increase in surface area causes most of the CO2 to be lost to the atmosphere within a few minutes and really does affect the taste.
So Yes, you need one to do this properly. Buy a machine first and start experimenting, but start looking out for good offers and snap one up when you can.
So, what are you looking for in a grinder?
- A burr grinder: A burr grinder literally ‘grinds’ coffee between two toothed plates, rather than the more usual kinds of coffee ‘grinders’ which are more like coffee ‘choppers’. You NEED a burr grinder. Bladed grinders won’t do.
- Not too big: You don’t need a large bean capacity, you won’t be storing beans in your grinder anyway. And you’re not grinding for a cafe, just yourself and guests.
I have a Cuisinart Grinder, which is sold on Amazon.com. It is cheap and works well.
The Coffee
What is good coffee? Well, that’s a matter of taste. As a personal preference I think beans should be well roasted without being burned (so think tan rather than treacle) and should contain 100% Arabica beans, with maybe a pinch of Robusta in a blend. Robusta is called ‘Robusta’ for a reason, it’s very strong and usually of poor quality.
- Reasonable pre-ground coffee
Firstly, i’ll cover ground coffee, and I think there are two options that are available from most supermarkets – Lavazza ‘Qualita Rossa‘ (the red and silver packet) and Lavazza ‘Cafe Espresso‘ (in the black box). Both are good, general purpose coffees, well packaged, finely ground, nice flavour and fairly well priced. The Rossa is mild and can be a little weak while the Cafe Espresso is bold and acidic, I detect a fair amount of Kenyan in it that might not be to everyone taste. There’s also the ‘Illy’ brand – it’s nice too but is much more expensive. Avoid the Lavazza ‘gusto’ coffee unless you’re happy you’ve got tolerant taste buds, it’s got a lot of Robusta in it and is strong and bitter.
It can be hard to find beans in a lot of supermarkets but they all carry a wide variety of pre-ground. With the above exceptions every one i’ve tried has been to course a grind to make good espresso (they’re really for filter machines) and quite disgustingly stale, simple as that. Just trust me and go with the Lavazza, you can always experiment later, maybe you’ll prove me wrong.
- Coffee Beans
Illy beans – Cheap, nice flavour, can be well packaged in nitrogen but I wasn’t convinced they were well sealed and they were quite stale. The most expensive supermarket bean so they may hang around on the shelves longer than others.
Lavazza Caffe Espresso – This one is my favourite supermarket bean. It smells nice, it looks nice, it’s well packaged, it’s the middle of the field on price and it tastes good (remember, this is just my preference). Like the Illy, it will lose a lot of it’s flavor within a day or so of opening the packet but is better then the other brands.
A lot of Delicatessens in the UK sell ‘fresh’ coffee beans in large jars behind the counter – AVOID!! They were fresh once but as soon as Mr Store Owner cuts open the sealed bag they came in and tips them into the jars the clock is ticking and they’re getting stale and are exposed to all the smells of a Deli. Remember that these beans have still been roasted elsewhere and shipped to the store in sealed bags, all the owner has done is cut them open and tip them into jars, it’s all about appearance.
- Storage
Store it in an airtight tin with a tight lid or the bag (rolled over and sealed). You can store coffee in the cupboard, I used to say you could put it in the freezer but I think this changes the taste a lot and if you will drink it all within a week or so than the cupboard is fine and will give the best taste, if you rarely drink coffee then i’d go for the freezer option or simply throw it away when it becomes stale. Store pre-ground the same but use as soon as possible (and this is still too late!). If you can, spend your money on a smaller quantity of freshly roasted beans – only what you can drink in a week. These may cost more per kg but you’ll waste less and the coffee will taste better. It’ll probably work our cheaper in the long run.
Things You Should Know…
There are some things you should keep in mind when making coffee. I’m going to run down all the ones that I think are important (and why) here so that I can be more concise describing the process later.
Grinding the coffee

You should have a fine ground coffee. I find that the preground coffee mentioned in the coffee section is actually just a little too fine. Your grind should be like course-fine sand but not dust, so that it forms a nice dry ‘puck’ in the hopper once you’re done with it (rather than a coffee goop) but allows water to pass through. You need to experiment to get the right setting. Just finely adjust the machine a setting in whichever direction every time you brew coffee – you’ll just know when you’re producing the correct results
Pre-warming

It is important to pre-warm your equipment, it means that you always have warm water running through your coffee in the hopper, and ensures that it stays warm in the cup (if it cools it will become bitter). You can switch your machine on before hand and allow the warming plates to heat your cups but this isn’t really convenient if you want a quick coffee in the morning. I turn the machine on, let the water warm up and then run a cupful through an empty hopper and into an espresso cup, this heats it all up nicely.
Here’s the first of a few small but important tips.
When making proper coffee there are some points of technique that can seem petty but are far more important then they appear.
When you have run the water through the hopper, turn out the now warm espresso cup, remove and dry the hopper. This is important. If you have moisture around the edges of your hopper then the water you pump through your coffee later will try, as water does, to follow the path of least resistance around the coffee and flow around the edges. You’ll still get coffee, but it won’t have as good a flavor.
Tamping

‘Tamping’ the coffee it when you press it down into the hopper and compact it somewhat. It’s probably the thing than most people don’t do right (and the thing that drives me scatty in cafes, when they have an expensive coffee machine and the operator – I won’t say ‘barista’ – just puts loose coffee grounds in the hopper, then pops it into the machine – I won’t pay for the light brown muck that comes out and it generates a lot of strange looks – I don’t care, it ruins the coffee it it’s not done right and people should take some pride in their work).
But I digress, the tamp distributes the coffee evenly around the hopper at the right density (A proper tamper is slightly convex so that the coffee is properly pressed into the side of the hopper), you should heap the coffee into the hopper and then press hard enough that the coffee is all pushed into the hopper, the press a little harder, so that you feel it settle out, officially around 20lbs of pressure for just a moment, you’ll get used to the feel and know after a month or so when you’ve done it right. I’d describe the feeling thus: When you’re walking on sand with a hardened surface, and you don’t sink in, then you roll forward on the ball of your foot and the sand gives way very slightly and your foot sinks in – you’re looking for a very similar feeling when you tamp, and as soon as you feel that slight movement, stop.
Crema

This is the nice layer of 3-4mm of light brown ‘cream’ that you get on a well poured espresso. You can’t really create it, but if you don’t see it you’re doing something wrong (see my comments about some cafes above and try tamping again!). It should curl up the edge of the cup and be robust enough to float most of a spoon of sugar on top for a few seconds. If your coffee doesn’t produce any crema, or only a thin and sorry looking layer, then the beans are probably old and stale – that’s the most common cause (although grind and tamp to play a part).
Amount
There are two types of shot you’ll be pulling a single (30-45ml) or a double (twice a single), remember, if you fill a double hopper and you don’t want that much, don’t pour that much – just don’t pour too much from one hopper, it’ll be bitter and you’ll want to throw it out. 1/4 of a cup is 60ml, so put 1/4 cup plus a splash of water into your espresso cup and remember where the level is, half it for a single.
Sugar
Light brown rather than white – that’s purely personal but I think it lends a nice ‘caramel’ flavour to the espresso.
- One double shot = 60-80ml (just over 1/4cup) of coffee
- You should be taking about 20 seconds to pull a double shot
- Use skimmed, semi-skimmed or whole milk and verify it’s fairly fresh if you can.
Volumes, Times and Other stuff
The Other Bits
There are of course a few more bits you need. Here’s a rundown
- Aerolatte
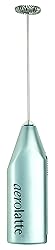 Steam foaming milk is an article in itself, and while it produces great results it’s messy, fiddly and requires practice, requiring a metal jug and thermometer for the best results. Search the internet for tutorials if you want, or try an Aerolatte, which provides a great result.
See the picture. These gadgets are great for frothing milk in the mug, and are far less bother than a steam frother which is really, really messy, gunges up before you can get a cloth to it and usually (on a budget machine), won’t deliver enough power anyway. The Aerolatte does very well – recommended.
There are a large number of aerolatte fakes around. Usually from pound stores and the like but i’ve seen them everywhere – normally around 3 pounds compared to aerolatte’s 20 pounds. They are cheap, they do the same job just as well, the Aerolatte is expensive (overpriced for what it is), but that said, it’s the original. I have a real one – go with your conscience.
2. Cups
 You’ll need two kinds, a couple of small espresso cups and some larger cappuccino mugs. I use a couple of nice Francois mugs, I like the Francois mugs because they taper up to the rim, I think it makes for a better froth.
3. Tamper
 These devices help to press down the coffee into the hopper and are actually very necessary. I made my first one by cutting a suitably sized piece of wood with a large circle-cutting drill bit and then screwing on a wooden handle.
5. Long Teaspoons
If you don’t get a couple of these you’ll curse yourself the first time you let go of your short teaspoon and it disappears under your foam – trust me!
4. Chocolate Shaker
Not really necessary, but if you keep your chocolate topping in one of these it’s much more convenient then shaking it over coffee with a teaspoon.
Making the Coffee

So, you’ve got The machine, you may have The coffee grinder, and you’ve got most of The other bits.. Let’s get you a great cup of espresso, and then turn it into cappuccino. Hopefully you’ve read everything so far and not skipped ahead (if you’re reading this first, go and stand in the corner). Let’s go.
- Warm the milk: If you’re making a cappuccino do the milk first, froth will actually be more robust if you let it sit a minute before pouring in your coffee and adding whatever toppings you want. So, a good cappuccino is even parts milk-espresso, you can go to more milk if you want, less milk and it’s called something else (the name escapes me). Just over half-fill your mug with milk (again, it’ll be to your personal taste after a while) and put it in the microwave for 1:30. (told you this was easy!).
- Froth your milk: When your milk is done remove from the microwave and go at it with your Aerolatte, it’ll take a few goes and some mike up the walls before you get it right but it’ll come. You should manage to fill the mug with foam almost to the top. Fresh milk results the best foam.
- Warm your espresso equipment: Warm your espresso cup and hopper, you can do this while the milk is heating – don’t forget to dry.
- Fill the hopper with coffee and tamp: Grind your coffee and heap into the hopper. For a double shot I use the ground equivalent of 16g of roasted beans, if your machine came with a measuring scoop, use 1 of ground for single, two for double) and tamp down, you’ll loose some over the edge, don’t worry, the coffee won’t completely fill the hopper any more, don’t worry.
- Pour your espresso: Place the hopper in the machine,ensure it’s tight, place the warm espresso cup below it and press the button (or move the lever) – at first you’ll get a few drips (if it pours straight away, you’re probably not tamping hard enough) but after 5 seconds or so you should have a nice, thin, steady stream. About 20 seconds is the sort of time that it should take to pour a double shot when you have your grind and your tamp sorted. Stop the pour and remove the cup with your frothy, aromatic, delicious espresso.
- If you’re just having an espresso, that’s you. Now you have to decide what flavour you do and don’t want, learn what variables change what flavours (that’s just experience) and then refine your pulling technique (wehey!) for your perfect shot.
Make a Cappuccino
If you have an espresso in one hand and a cup of frothy milk in the other you probably want an cappuccino. Hopefully you’ve figured out the next step yourself. If not, pour the espresso into the milk.
Now, sprinkle over your chocolate and if you want, cinnamon and nutmeg (cinnamon from a jar is fine, but fresh nutmeg is definitely the best)
Add sugar if you want it, sit back and enjoy. Hopefully this one is the best you’ve ever tasted. If it isn’t, keep trying – you’ll soon beat the big guys every time.
Take care.
Conclusion
You can’t make a great cup of coffee for nothing. But you don’t need to spend a fortune for a set of equipment that will turn out amazing results with a little practice.
If you remember a few simple principles, buy equipment for basic functionality rather than useless extras and practice until you get a result you’re happy with a luxurious, delicious treat can be yours any time you want.
Start with a good quality machine, but remember that you need not spend a fortune and you can afford to spend a little more on those little extras that’ll bring the drink together. Investment a little in a quality Burr grinder and your setup will be complete. Certainly you need spend no more that 150 pounds in total for perfect results.
Learn about what makes a perfect espresso, think about what you change every time you make one and remember what works to bring out the flavours you’re looking for.
Now, sit back and enjoy.
See Next: Best French Press Coffee Makers